


Recording screen on macOS is easier than on Windows since you don’t want to install any extra software. You can start a new screen recording session on your macOS with the built-in QuickTime app or with the handy Shift + Command + 5 shortcut on macOS Mojave and later.

Both options allow you to record screen with audio from your microphone but not with the internal audio.
To record macOS internal audio, we need to first install an audio capturing tool first. There are several such applications available on Mac and I will share about those later in the article but let’s first see how to record macOS screen with internal audio using LoopBack from RogueAmoeba.
1. Download and install LoopBack
Once installed, launch the application and create a new virtual device. By default, a Pass-Thru block will be present in the source and this will capture all system sounds. If you don’t want that, you can delete the block and add a new one to capture from specific applications only.
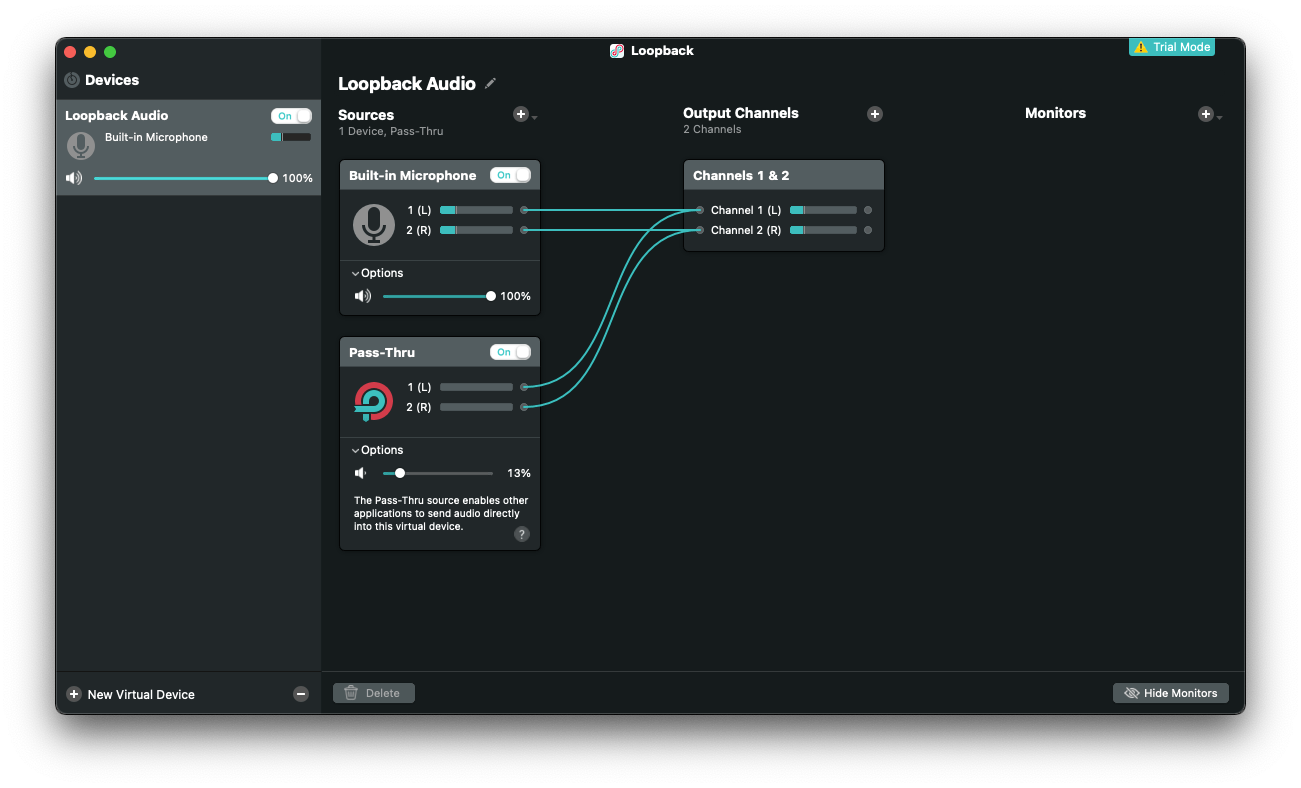
Add a Built-in Microphone block to the same virtual device if you want to record your voice as well. But make sure to adjust the audio levels of the Pass-Thru block or your voice won’t be heard clearly.
“Loopback from @RogueAmoeba is more powerful, very nice and user-friendly version of Soundflower. Insta-buy.”
Kenn R
2. Change Output Audio
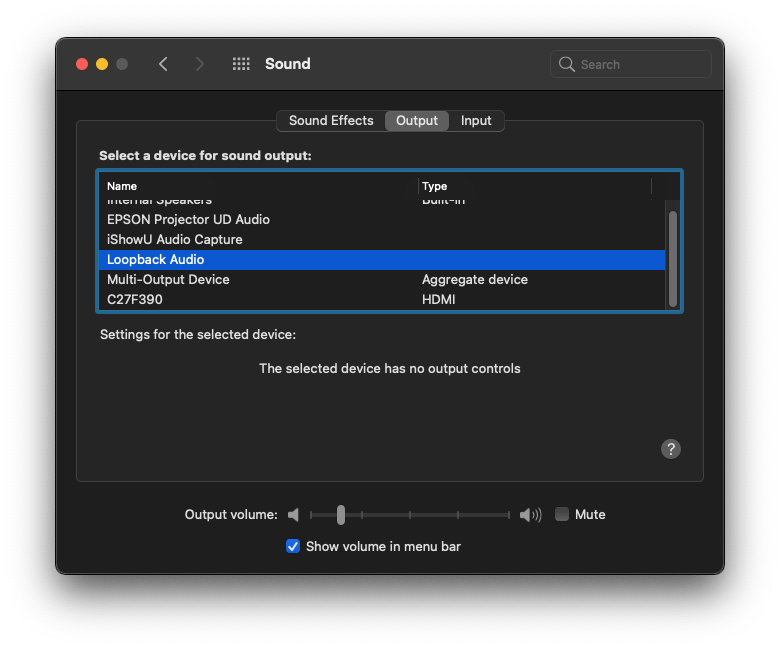
Next, open Sound settings from Spotlight (or System Preferences -> Sound). Switch to the Output tab and select the newly added Loopback Audio.
Note: You won’t be hearing any audio from your speakers once you switch the output device. Do not forget to revert back to the original device after you’re done with the screen recording.
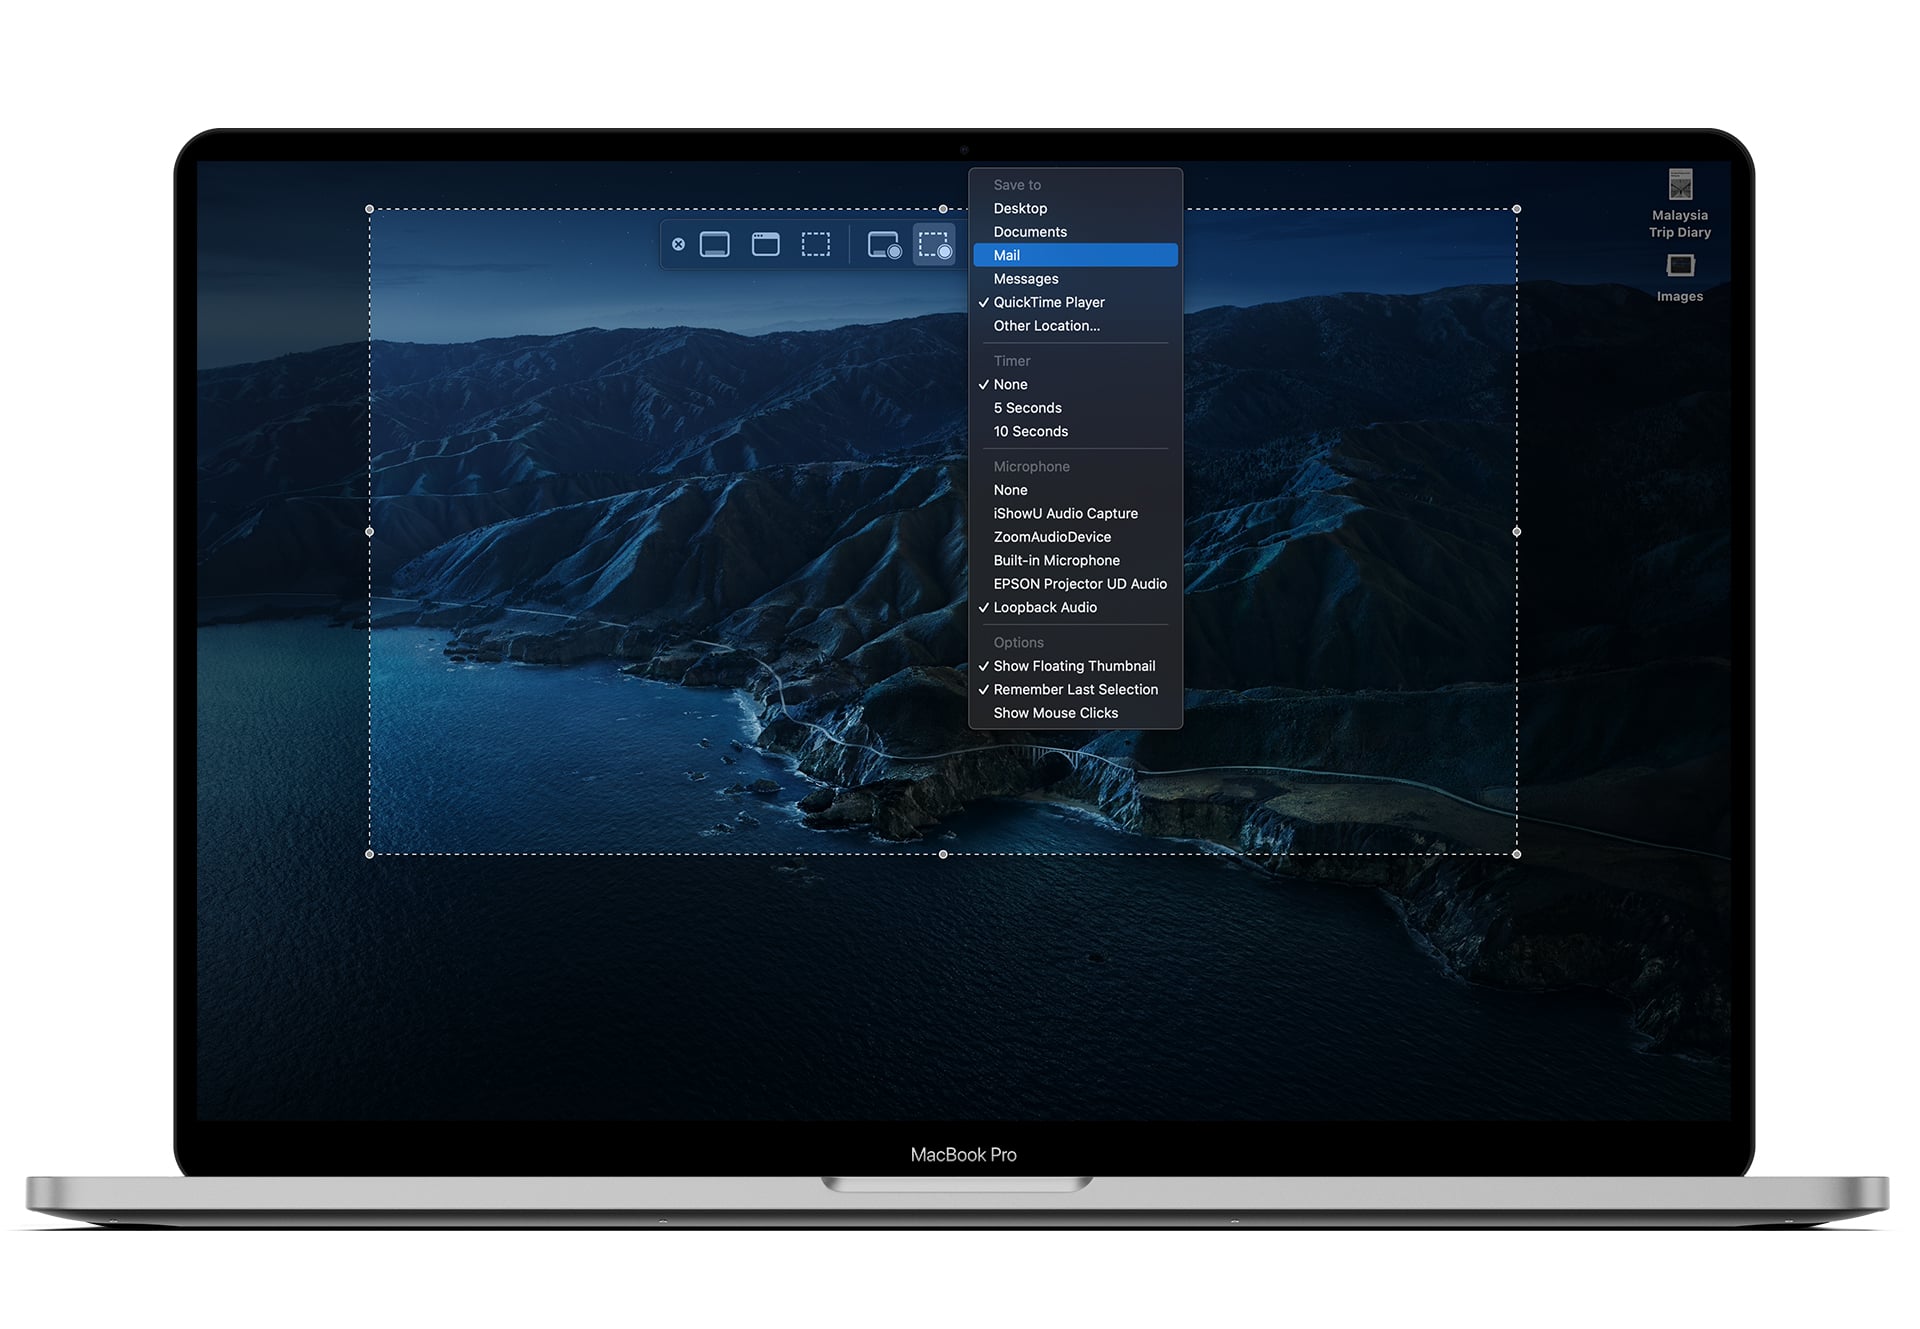
3. Start Recording
Finally, open QuickTime, go to File -> New Screen Recording. Select the area to be recorded and change Microphone to Loopback Audio. Click Record and you’re good to go!
Once you’re done with the recording, click the stop icon in the menu bar. You can compress the video file size with an encoding software like HandBrake.
With Loopback, recording inbuilt-audio is as easy as that. The software is free to use with but with a quality degradation after 20 minutes of free usage.
If you’re looking for a completely free audio grabber tool, then checkout the next two.


Other Internal Audio Capturing Applications for Mac
iShowU Audio Capture
Refer to this article for instructions on setting up iShowU Audio Capture. This software is similar to Loopback or Soundflower in terms of functionality but offers no other features.
One issue that I noticed with iShowU is that you cannot merge microphone and system audio stream together like Loopback allows you to do.
Blackhole Virtual Audio Driver
BlackHole is a modern macOS virtual audio driver that allows applications to pass audio to other applications with zero additional latency. Their GitHub repo contains instructions on how to setup Blackhole for system audio recording.
You have to setup a multi output device in order to do that.


